
首先,第一步,老规矩,引入SpringBoot的依赖
    <parent>
        <groupId>org.springframework.boot</groupId>
        <artifactId>spring-boot-starter-parent</artifactId>
        <version>2.3.3.RELEASE</version>
    </parent>
然后 引入 ElasticSearch 的依赖
        <!--引入es的坐标-->
        <dependency>
            <groupId>org.elasticsearch.client</groupId>
            <artifactId>elasticsearch-rest-high-level-client</artifactId>
            <version>7.10.2</version>
        </dependency>
        <dependency>
            <groupId>org.elasticsearch.client</groupId>
            <artifactId>elasticsearch-rest-client</artifactId>
            <version>7.10.2</version>
        </dependency>
        <dependency>
            <groupId>org.elasticsearch</groupId>
            <artifactId>elasticsearch</artifactId>
            <version>7.10.2</version>
        </dependency>
        <dependency>
            <groupId>com.alibaba</groupId>
            <artifactId>fastjson</artifactId>
            <version>1.2.74</version>
        </dependency>
创建 测试类
import org.apache.http.HttpHost;
import org.elasticsearch.client.RestClient;
import org.elasticsearch.client.RestHighLevelClient;
import org.junit.jupiter.api.Test;
import org.springframework.boot.test.context.SpringBootTest;

@SpringBootTest
public class RunAppTest {

    @Test
    void contextLoads(){

        RestHighLevelClient restHighLevelClient = new RestHighLevelClient(RestClient.builder(
                new HttpHost("192.168.3.10",9200,"http")
        ));


    }
}
上述是一个 单独的 操作对象,每次操作都去创建这个类,不仅代码繁琐,性能也会更加的差。所以,我们就交友Spring进行管理。
创建配置信息 application.yml(这里 我没仔细研究 没有大写字母)
# 自己创建的信息,以便将来配置类来读取
elasticsearch:
host: 192.168.3.10
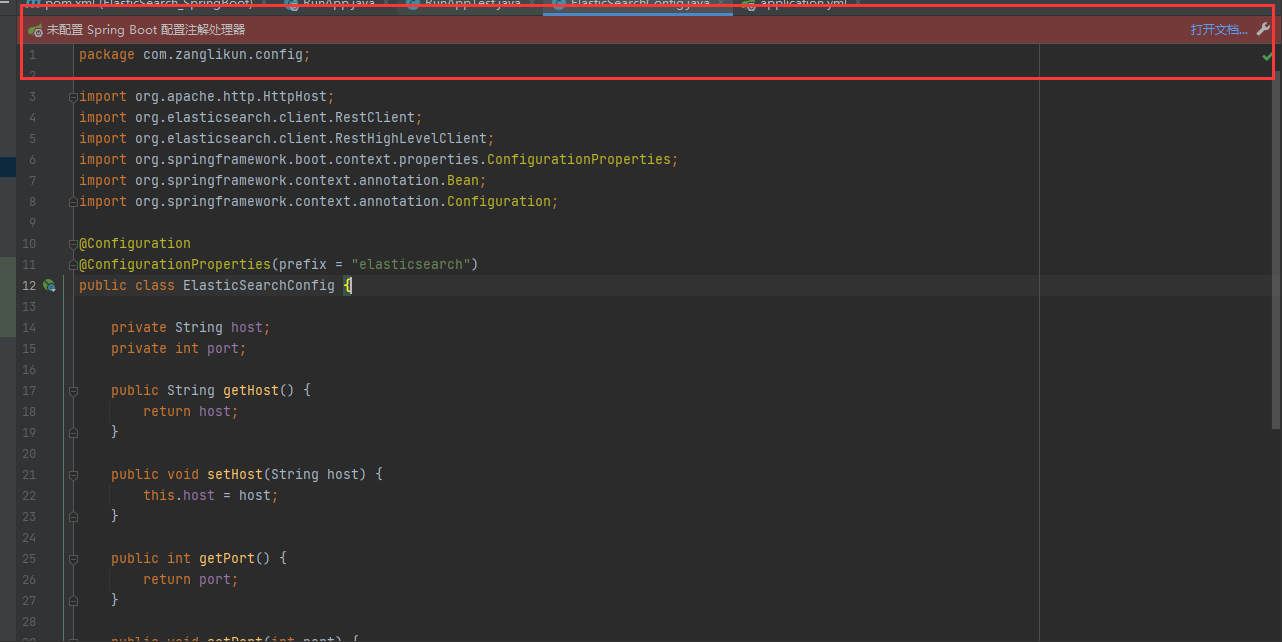
port: 9200然后创建配置类

这里代码 会有异常,但是不要担心,正常跑就行
import org.apache.http.HttpHost;
import org.elasticsearch.client.RestClient;
import org.elasticsearch.client.RestHighLevelClient;
import org.springframework.boot.context.properties.ConfigurationProperties;
import org.springframework.context.annotation.Bean;
import org.springframework.context.annotation.Configuration;

@Configuration
@ConfigurationProperties(prefix = "elasticsearch")
public class ElasticSearchConfig {

    private String host;
    private int port;

    public String getHost() {
        return host;
    }

    public void setHost(String host) {
        this.host = host;
    }

    public int getPort() {
        return port;
    }

    public void setPort(int port) {
        this.port = port;
    }

    @Bean
    public RestHighLevelClient client() {
        return new RestHighLevelClient(RestClient.builder(
                new HttpHost(host, port, "http")
        ));
    }
}
然后 配置类创建好了,以后,我们就可以通过
    @Autowired
    private RestHighLevelClient client;
来进行操作了。
上述代码下载:
具体操作
下文所有代码 请将后缀改为 .java 即可运行
html 下载: 1832319-db9aaee129c27e0.html
原来txt文件 没有指定编码: https://www.zanglikun.com/wp-content/uploads/2021/01/1611832319-db9aaee129c27e0.txt
浏览器打开txt是乱码,右键 - 另存为(Ctrl + S)即可 保存的内容是源文件,如果你要是把代码全选然后在复制的话,就会乱码!
索引操作
简单添加索引
    @Test
    void addIndex() throws IOException {
        // 使用clent获取操作索引的对象
        IndicesClient indices = client.indices();
        // 指定索引名称
        CreateIndexRequest createRequest = new CreateIndexRequest("itheima");
        // 创建索引
        CreateIndexResponse response = indices.create(createRequest, RequestOptions.DEFAULT);
        // 根据返回值 判断结果。
        System.out.println(response.isAcknowledged());
    }
每次创建 都会给你相应,中有 isAcknowledged ,所以 用此判断 创建索引的结果
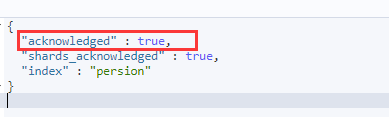
查询结果,创建成功

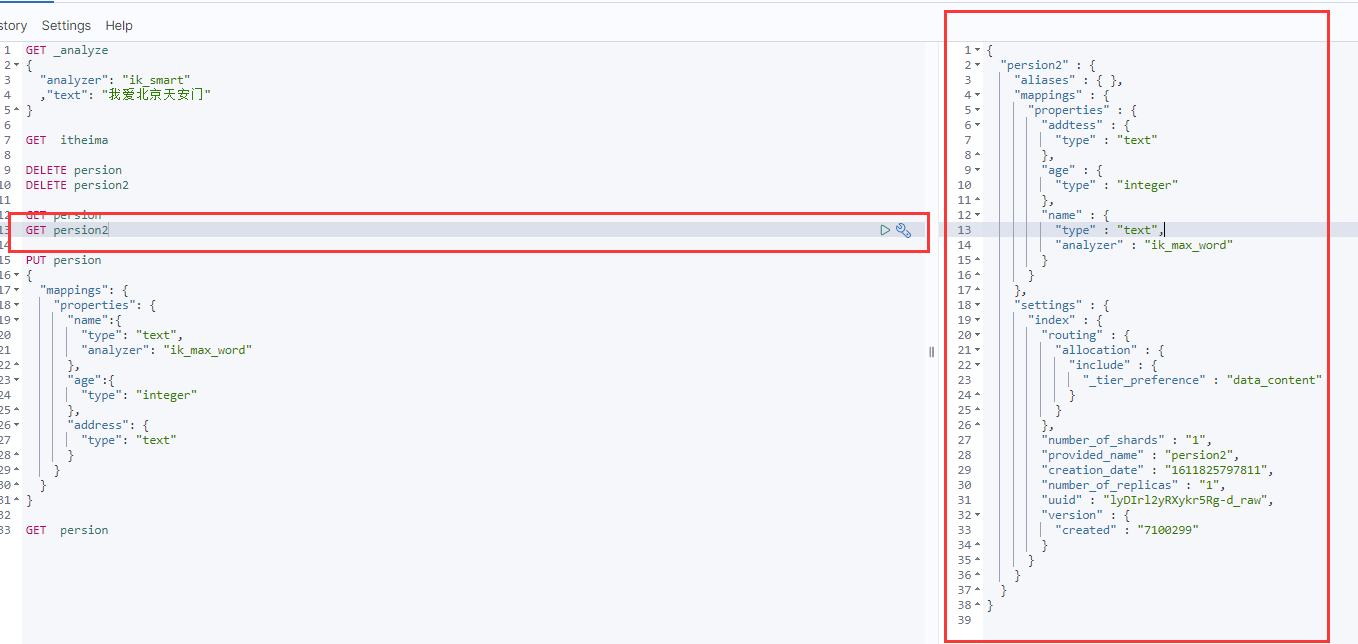
创建索引 指定 映射信息
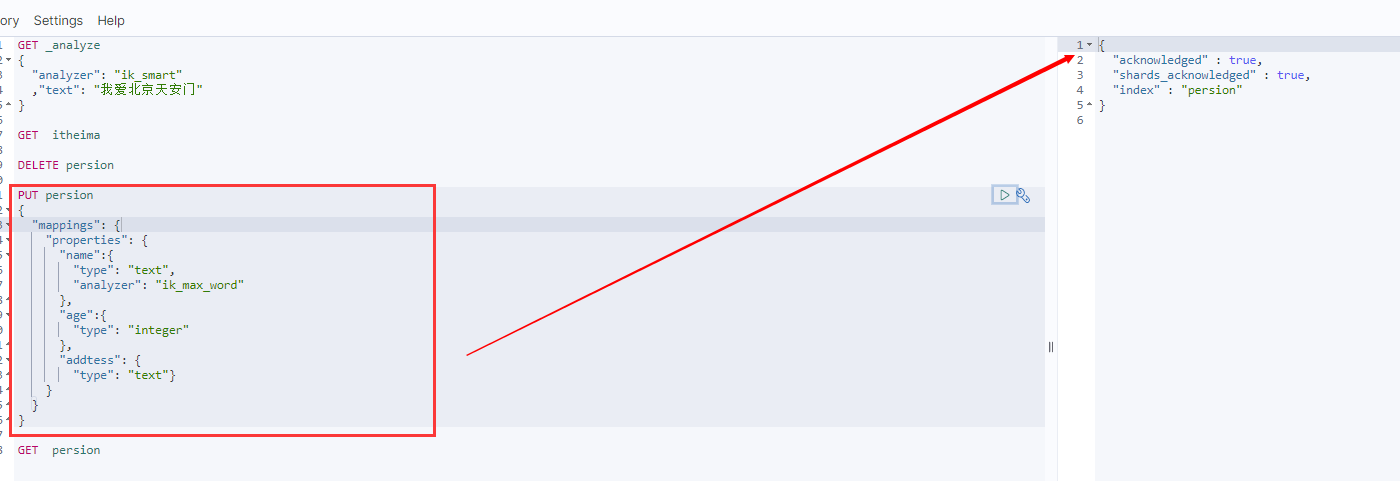
我们要创建的时候 指定映射,就需要把创建映射的 内容获取
{
    "properties": {
      "name":{
        "type": "text",
        "analyzer": "ik_max_word"
      },
      "age":{
        "type": "integer"
      },
      "addtess": {
        "type": "text"}
    }
  }
拿到将来用于 Java的配置
 @Test
    void addIndexWithMapping() throws IOException {
        // 使用clent获取操作索引的对象
        IndicesClient indices = client.indices();
        // 指定索引名称
        CreateIndexRequest createRequest = new CreateIndexRequest("persion2");
        // 制作 Mapping 内容
        String mapping = "{\n" +
                "    \"properties\": {\n" +
                "      \"name\":{\n" +
                "        \"type\": \"text\",\n" +
                "        \"analyzer\": \"ik_max_word\"\n" +
                "      },\n" +
                "      \"age\":{\n" +
                "        \"type\": \"integer\"\n" +
                "      },\n" +
                "      \"addtess\": {\n" +
                "        \"type\": \"text\"}\n" +
                "    }\n" +
                "  }";
        // 绑定 Mapping 指定Json格式 与数据
        createRequest.mapping("_doc",mapping, XContentType.JSON);
        // 创建索引
        CreateIndexResponse response = indices.create(createRequest, RequestOptions.DEFAULT);
        // 根据返回值 判断结果。
        System.out.println(response.isAcknowledged());
    }
执行后 看下 Persion2 ,成功
查询索引 结构
    @Test
    void queryIndex() throws IOException {

        // 使用clent获取操作索引的对象
        IndicesClient indices = client.indices();
        // 指定查询的索引 信息 persion2
        GetIndexRequest getIndexRequest = new GetIndexRequest("persion2");
        // 开始查询
        GetIndexResponse response = indices.get(getIndexRequest, RequestOptions.DEFAULT);
        // 获取 查询中的 Mapping信息
        Map<String, MappingMetadata> mappings = response.getMappings();
        // 遍历它
        Set<String> strings = mappings.keySet();
        for (String string : strings) {
            System.out.println(string + "  " +mappings.get(string).getSourceAsMap() );
        }

    }
这里 相当于 GET persion2/_mapping 差不多
这是控制台结果
persion2 {properties={address={type=text, fields={keyword={ignore_above=256, type=keyword}}}, name={type=text, fields={keyword={ignore_above=256, type=keyword}}}, id={type=text, fields={keyword={ignore_above=256, type=keyword}}}, age={type=text, fields={keyword={ignore_above=256, type=keyword}}}}}删除索引
    @Test
    void deleteIndex() throws IOException {

        // 使用clent获取操作索引的对象
        IndicesClient indices = client.indices();
        // 指定删除的索引 信息 persion2
        DeleteIndexRequest deleteIndexRequest = new DeleteIndexRequest("persion2");
        // 删除数据
        AcknowledgedResponse delete = indices.delete(deleteIndexRequest, RequestOptions.DEFAULT);
        // 输出 删除 结果
        System.out.println(delete.isAcknowledged());

    }
这里 相当于 DELETE persion2
判断索引是否存在
    @Test
    void existIndex() throws IOException {

        // 使用clent获取操作索引的对象
        IndicesClient indices = client.indices();
        // 指定判断是否存在的索引 信息 persion2
        GetIndexRequest getIndexRequest = new GetIndexRequest("persion2");
        // 拿到 结果
        boolean exists = indices.exists(getIndexRequest, RequestOptions.DEFAULT);
        // 输出 结果
        System.out.println(exists);

    }
文档操作
添加一个 Map里面数据到一个 文档
    @Test
    void addDoc() throws IOException {

        // 数据对象
        Map data = new HashMap<>();
        data.put("address","北京海淀");
        data.put("age","20");
        data.put("name","李四");

        // 创建文档操作对象
        IndexRequest indexRequest = new IndexRequest("persion2").id("1").source(data);
        // 使用clent 添加文档
        IndexResponse response = client.index(indexRequest, RequestOptions.DEFAULT);
        // 打印相应结果
        System.out.println(response.toString());

    }
查询 GET persion2/_doc/1 如果 再次添加一个ID=1 将会覆盖原有数据。
添加一个Java对象到 文档
    @Test
    void addDocWithJAVAObject() throws IOException {

        // 数据对象
        Persion persion = new Persion();
        persion.setName("小王八蛋");
        persion.setAddress("北京朝阳区");
        persion.setAge(18);
        persion.setId("2");
        // 使用FastJson 将对象转位Json
        String data = JSON.toJSONString(persion);


        // 创建文档操作对象
        IndexRequest indexRequest = new IndexRequest("persion2").id(persion.getId()).source(data,XContentType.JSON);
        // 使用clent 添加文档
        IndexResponse response = client.index(indexRequest, RequestOptions.DEFAULT);
        // 打印相应结果
        System.out.println(response.toString());

    }
添加成功!!!
修改文档
(与添加一样,如果没有就添加,有就覆盖)
@Test
void updateDocWithJAVAObject() throws IOException {

    // 数据对象
    Persion persion = new Persion();
    persion.setName("小王八蛋");
    persion.setAddress("北京朝阳区");
    // 将ID 变成 88
    persion.setAge(88);
    persion.setId("2");
    // 使用FastJson 将对象转位Json
    String data = JSON.toJSONString(persion);

    // 创建文档操作对象
    IndexRequest indexRequest = new IndexRequest("persion2").id(persion.getId()).source(data,XContentType.JSON);
    // 使用clent 添加文档
    IndexResponse response = client.index(indexRequest, RequestOptions.DEFAULT);
    // 打印相应结果
    System.out.println(response.toString());

}
查询文档
@Test
void selectDocWithJAVAObject() throws IOException {

    // 创建 将要查询的文档数据 GetRequest
    GetRequest getRquest = new GetRequest("persion2","2");
    // 通过 client 进行查询 GetRequest
    GetResponse response = client.get(getRquest, RequestOptions.DEFAULT);
    // 获取结果 并输出
    System.out.println(response.getSourceAsString());

}
等价于 GET persion2/_doc/2
删除文档
    @Test
    void deleteDocWithJAVAObject() throws IOException {

        // 创建 将要查询的文档数据 GetRequest

        // 通过 client 进行查询 GetRequest ID 不添加可能会报错。
        DeleteRequest deleteRquest = new DeleteRequest("persion2","2");
        DeleteResponse response = client.delete(deleteRquest, RequestOptions.DEFAULT);
        // 因为删除的时候会返回我们输入ID,切记,相应ID了 不代表删除成功,应该以 下面的status为准 我怀疑 status是 Http的响应码
        System.out.println("删除的ID是"+response.getId());
        System.out.println(response.status()); //OK 或者 NOT_FOUND

    }
等价于 DELETE persion2/_doc/2
到这里,我们SpringBoot整合的代码 ,就写完了。
第三方平台不会及时更新本文最新内容。如果发现本文资料不全,可访问本人的Java博客搜索:标题关键字。以获取最新全部资料 ❤
免责声明: 本站文章旨在总结学习互联网技术过程中的经验与见解。任何人不得将其用于违法或违规活动!所有违规内容均由个人自行承担,与作者无关。
评论(0)