
先去Consul配置一些配置
注意:如果你YAML存储中有一条是Json 格式是:key: '{Json}'。记得一定是单引号包起来的!
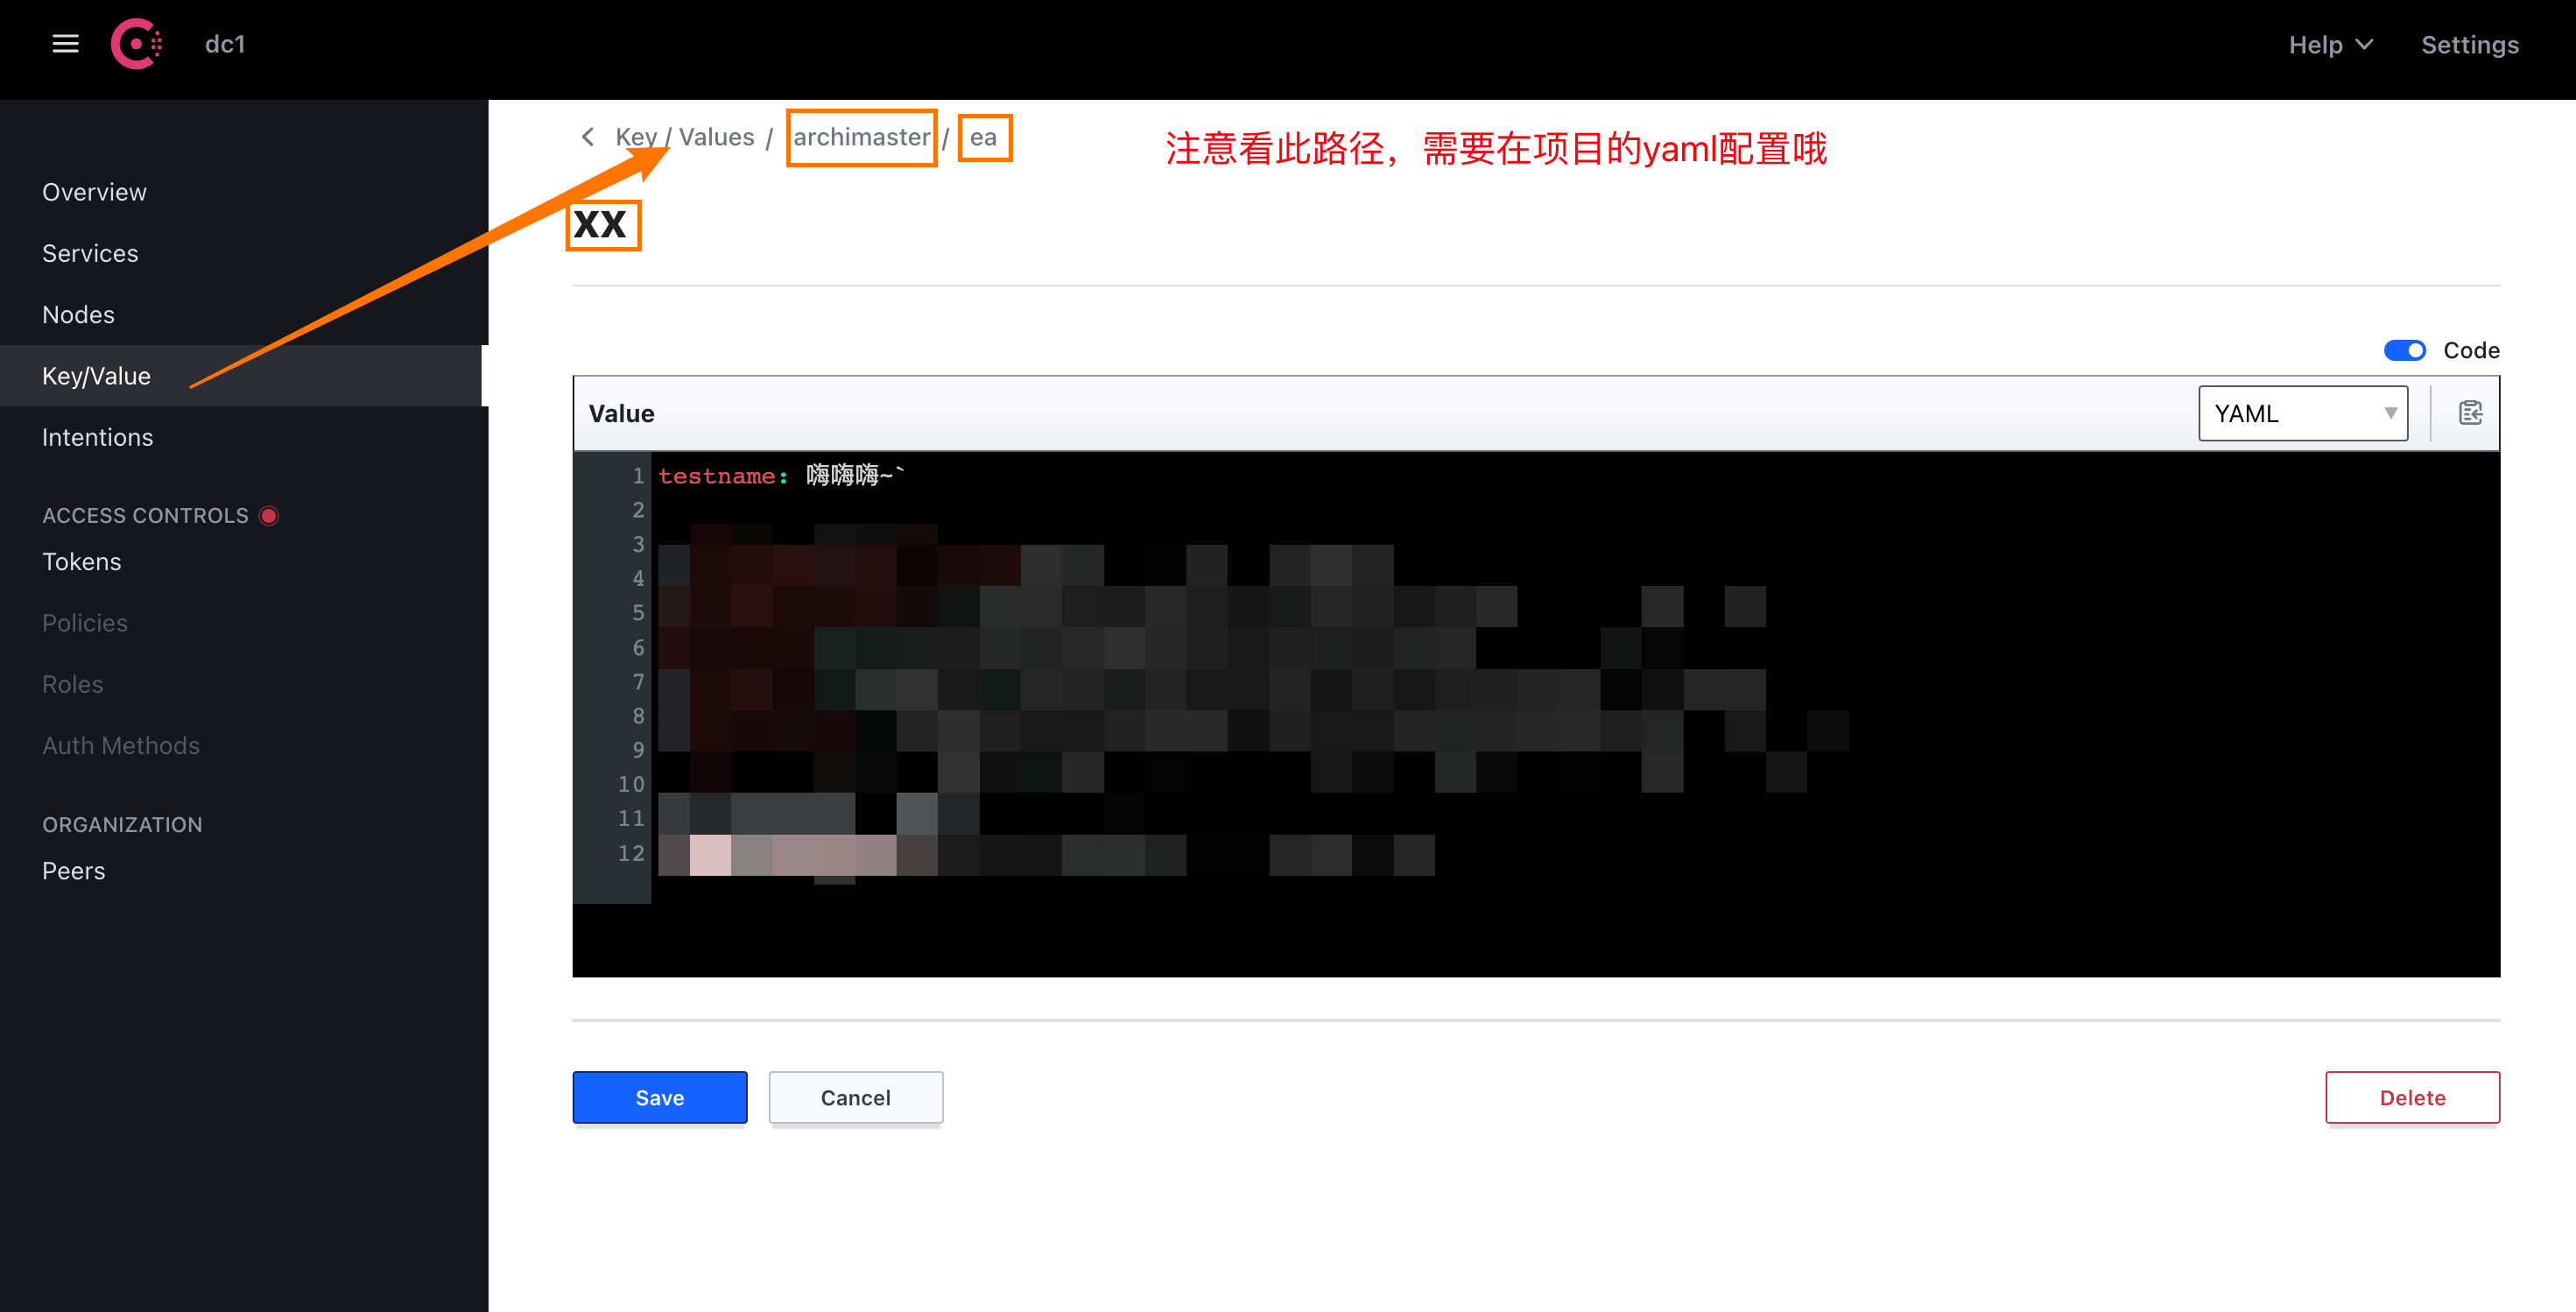
Spring项目去找的配置文件位置在:prefix + "/" + default-context + "/" + data-key 3部分组成
配置完成后,自己的项目自己配置好。
spring:
  cloud:
    consul:
      host: ${register.center.host}
      port: ${register.center.port}
      enabled: true
      scheme: HTTP
      discovery:
        #        health-check-path: /actuator/health #检测实例健康
        #        health-check-interval: 10s
        #配置实例地址
        #        register: true # 自动注册
        service-name: ${spring.application.name} #实例名称
      # 配置中心  https://www.bilibili.com/video/BV1CV411E7NS?p=5&vd_source=973117b270742b5caf7a371f661d0495
      config:
        enabled: true # 开启注册中心
        format: yaml
        prefix: archimaster # 默认是config
        default-context: ea # 默认是application
        data-key: xx # 默认是data
        profile-separator: '-' # 这里的原理还不太清楚,源代码默认是","但init方法写的是如果format是key_value则是"-"
        # 找到配置中心文件的路径就是:archimaster/ea/xx
        watch:
          enabled: true
          wait-time: 1_000 # 1秒刷新变更
使用
import lombok.extern.slf4j.Slf4j;
import org.junit.Test;
import org.junit.runner.RunWith;
import org.springframework.beans.factory.annotation.Value;
import org.springframework.boot.test.context.SpringBootTest;
import org.springframework.cloud.context.config.annotation.RefreshScope;
import org.springframework.context.annotation.Configuration;
import org.springframework.test.context.ActiveProfiles;
import org.springframework.test.context.junit4.SpringRunner;
import org.springframework.test.context.web.WebAppConfiguration;


@RunWith(SpringRunner.class)
@WebAppConfiguration // 启动web运行环境 可有可无
@SpringBootTest(classes = {ArchiMasterApiStarter.class}) // 编写测试类
@Slf4j
@ActiveProfiles({"dev"})
@Configuration
@RefreshScope // Junit测试不会刷新@Value的值,Spring容器内部加入此注解就可以自动更新
public class ArchiMasterTest {


    //@Value("${logging.level.root}")
    @Value("${getAllAccount}")
    private String logLevel;

    @Value("${spring.cloud.consul.host}")
    private String host;

    @Value("${spring.cloud.consul.port}")
    private String port;

    @Value("${spring.cloud.consul.config.prefix}")
    private String prefix;

    @Value("${spring.cloud.consul.config.default-context}")
    private String defaultContext;

    @Value("${spring.cloud.consul.config.data-key}")
    private String dataKey;

    @Value("${testname}") // 这里在配置文件中的名称哦
    private String testname;


    @Test
    public void TectConsulGetConf() throws InterruptedException {
        // todo 不知道为什么Consul配置中心在配置内容发生变更的时候,junit启动的项目遇到错误2023-09-20 15:59:57.418|ERROR||||||[configWatchTaskScheduler-4]|o.s.b.SpringApplication - [log,101] - Application run failed
        //java.lang.IllegalArgumentException: Could not resolve placeholder 'spring.profiles.active' in value "archi-master-api-${spring.profiles.active}"
        for (int i = 0; i < 10; i++) {

            System.out.println(
                    String.format("请访问%s,侧边栏找到Key/Value,创建目录层级是%s,选择格式yaml 填入内容:testname=嗨嗨嗨",
                            host + ":" + port,
                            prefix + "/" + defaultContext + "/" + dataKey
                    ));
            System.out.println("所以我们拿到的Consul配置中心的配置就是:" + testname);
            System.out.println(logLevel);

            Thread.sleep(10_000);
        }
    }
}
特殊说明:
上述文章均是作者实际操作后产出。烦请各位,请勿直接盗用!转载记得标注原文链接:www.zanglikun.com
第三方平台不会及时更新本文最新内容。如果发现本文资料不全,可访问本人的Java博客搜索:标题关键字。以获取最新全部资料 ❤
免责声明: 本站文章旨在总结学习互联网技术过程中的经验与见解。任何人不得将其用于违法或违规活动!所有违规内容均由个人自行承担,与作者无关。
第三方平台不会及时更新本文最新内容。如果发现本文资料不全,可访问本人的Java博客搜索:标题关键字。以获取最新全部资料 ❤
免责声明: 本站文章旨在总结学习互联网技术过程中的经验与见解。任何人不得将其用于违法或违规活动!所有违规内容均由个人自行承担,与作者无关。